Building Fullstack AI Apps in Python with Google ADK and Gradio
Learn how to use Gradio to create rich UIs with Python, and integrate them into Google's Agent Development Kit (ADK).

All code and examples in this post can be found at the szns-gradio Github repo
Creating AI applications has never been easier, but the current developer ecosystem has one important gap in its tooling. How do you go from a multi-agent backend, either locally or in the cloud, to a web application that you and your users can meaningfully interact with?
Let’s say you’ve created a multi-agent workflow with Google’s Agent Development Kit (ADK). You’ve defined your agents, integrated your function tools, and have deployed to the managed Vertex AI service in GCP. There exists an entry-point into the backend through the Query URLs, but how do your users engage with it? Generally, the expectation is to roll your own UI: develop a dynamic frontend application, implement asynchronous calls to the backend, parse responses, display chat history, input validation, etc.
Shouldn’t there be an off the shelf solution?
Introducing Gradio!
Gradio is an open-source library that lets you create and define UI components with an intuitive Python SDK. Just as Node.js allowed Javascript developers to venture into the server-side and become fullstack engineers, Gradio similarly allows backend developers to continue using Python, the leading language of AI, when developing their frontend.
Gradio Hello World Examples
Consider these Hello World examples for Gradio involving text, images, and a chat interface.
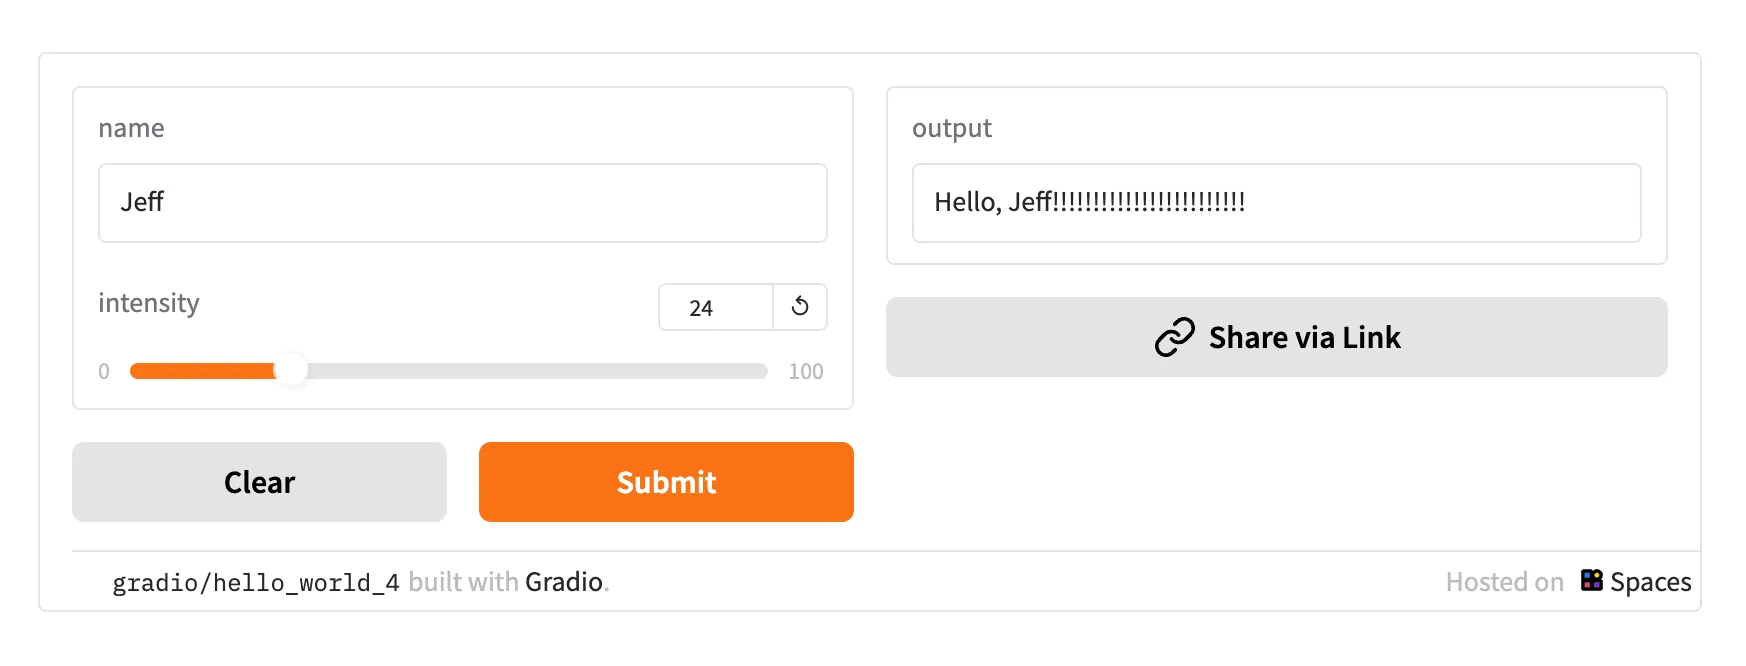
Notice how we define an Interface with the gr (Gradio) library. We can define a text and a slider input, which get passed as parameters to the function set in the fn parameter, which in this file is the function greet().
Once greet() is invoked, it is returned as one of the text outputs.
import gradio as gr

def greet(name, intensity):
    return "Hello, " + name + "!" * int(intensity)

demo = gr.Interface(
    fn=greet,
    inputs=["text", "slider"],
    outputs=["text"],
)

demo.launch()
You can run these examples by saving the code samples as a file such as hello_world.py, installing the Python requirements with uv, and then running python hello_world.py.
# 1. Navigate to the /gradio-examples directory
cd gradio-examples

# 2. Create a virtual environment in the current folder
uv venv

# 3. Activate the virtual environment to isolate dependencies
source .venv/bin/activate

# 4. Install all required packages from the requirements file
uv pip install -r requirements.txt

# 5. Run the application
python hello_world.py
The terminal output then explains where we can find the UI, and will look something like this:
ryan@Ryans-MacBook-Pro-2 gradio-examples % python hello_world.py
* Running on local URL:  http://127.0.0.1:7860
* To create a public link, set `share=True` in `launch()`.
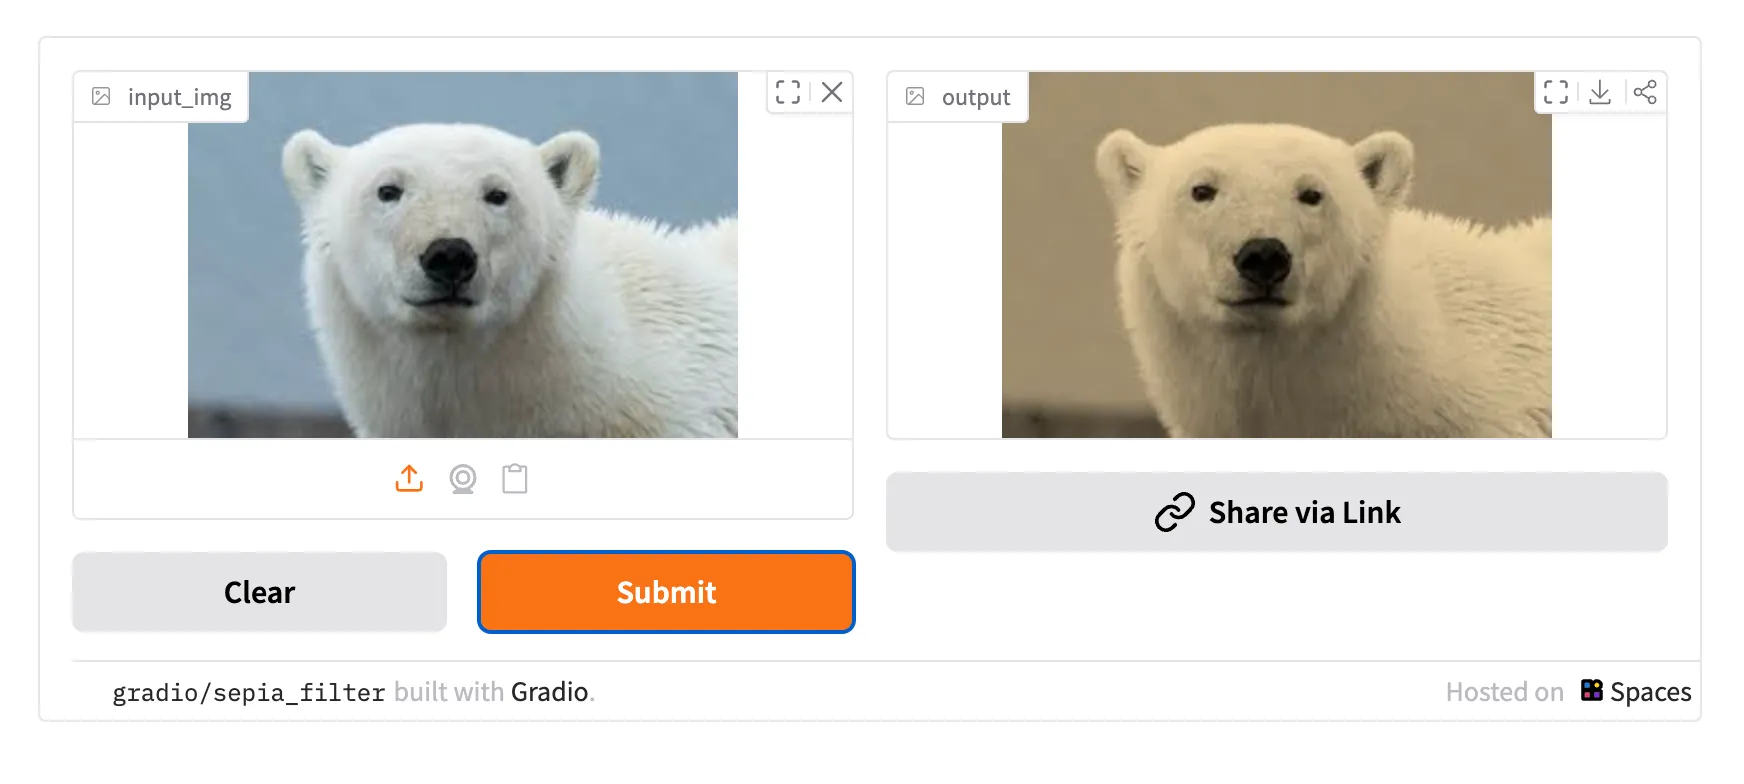
Similarly, we can again work with another Interface, but instead choose an image upload element as the input, transform it with a numpy filter, and then output the new result as an sepia-tinted image.
import numpy as np
import gradio as gr

def sepia(input_img):
    sepia_filter = np.array([
        [0.393, 0.769, 0.189],
        [0.349, 0.686, 0.168],
        [0.272, 0.534, 0.131]
    ])
    sepia_img = input_img.dot(sepia_filter.T)
    sepia_img /= sepia_img.max()
    return sepia_img

demo = gr.Interface(sepia, gr.Image(), "image")
demo.launch()
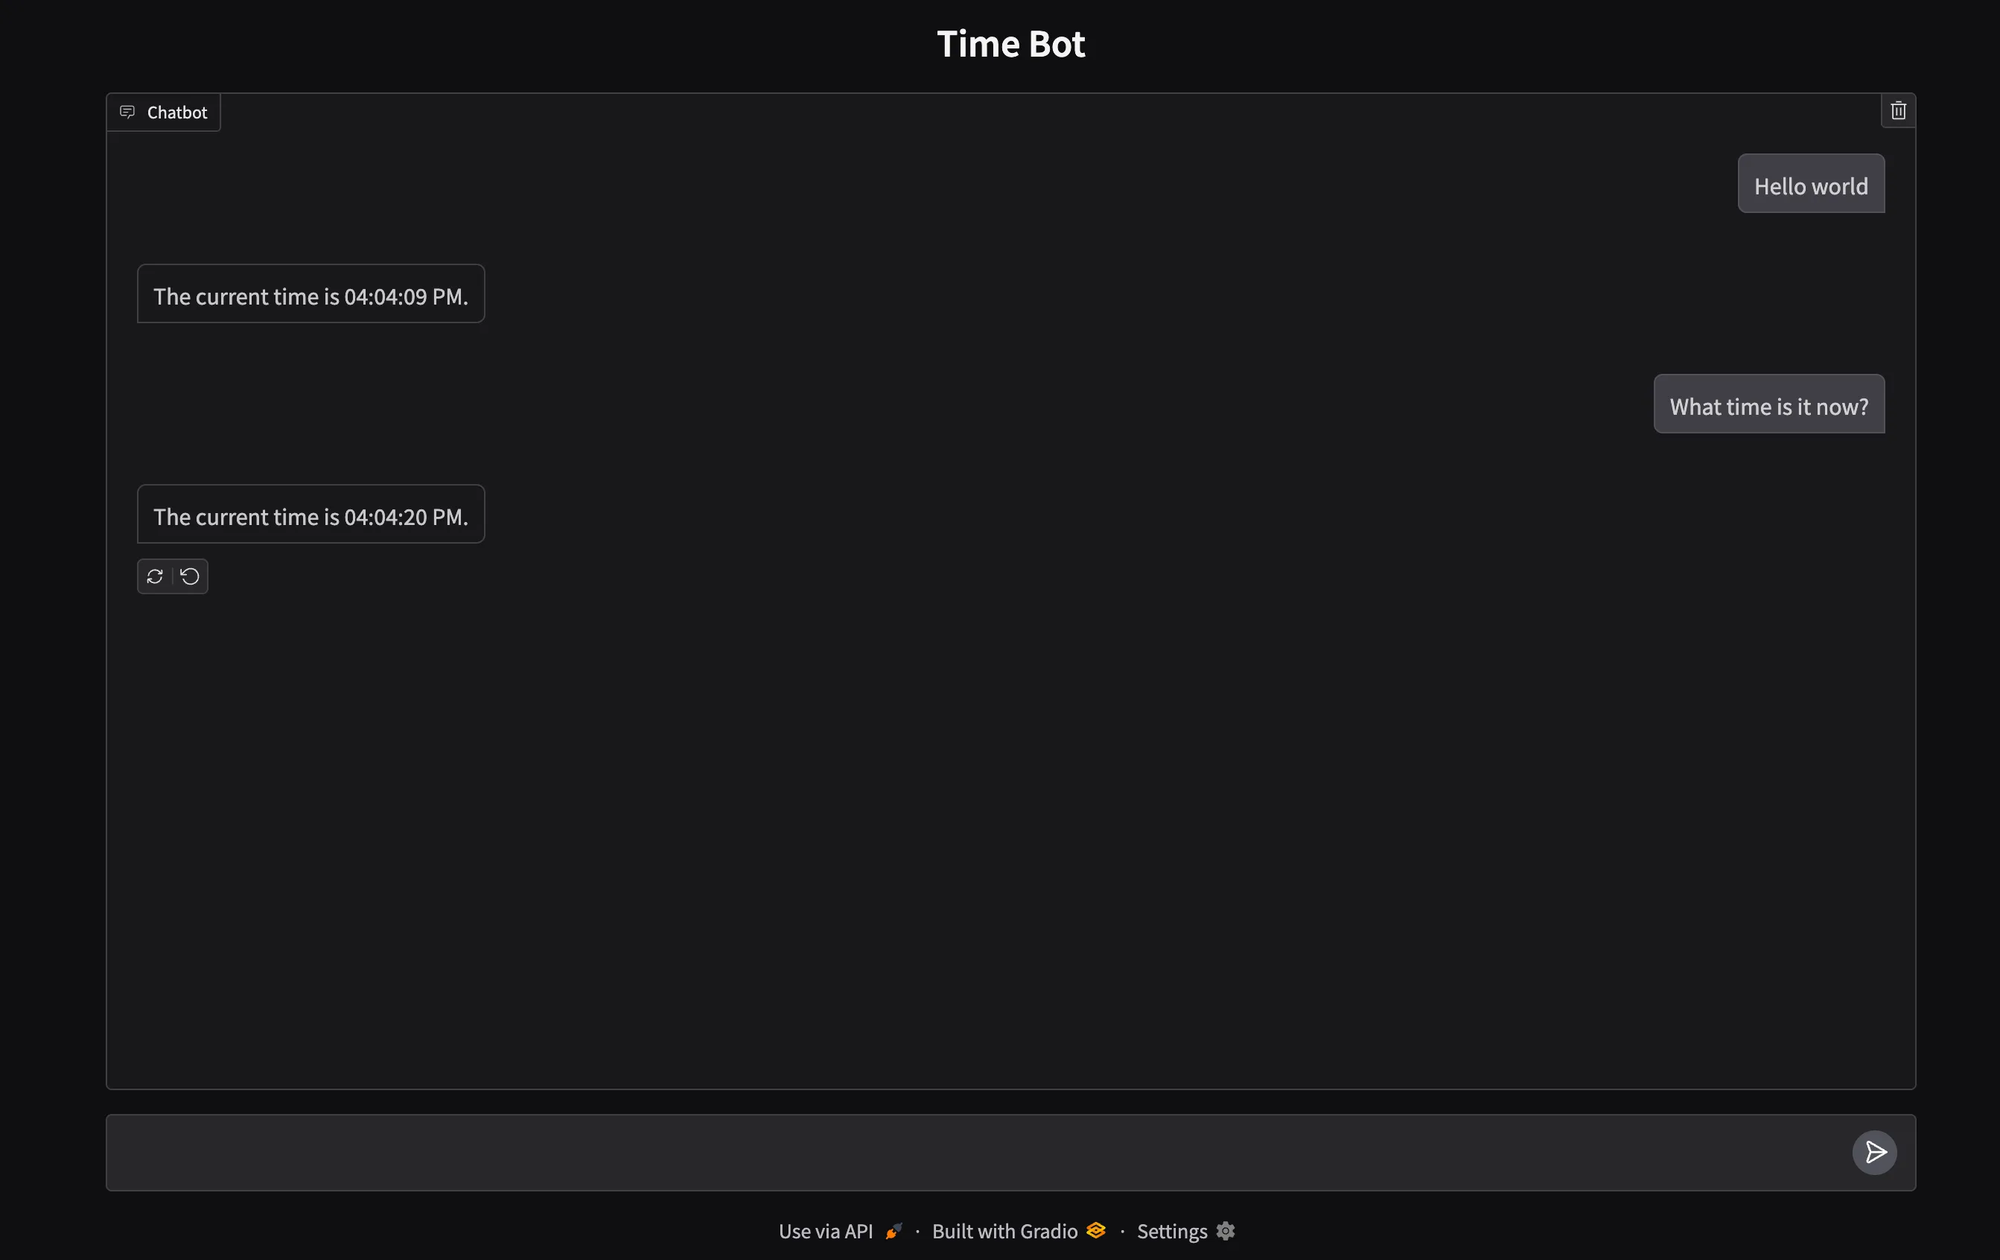
Gradio is especially powerful for chat applications. Instead of installing a JavaScript framework and coding a fully dynamic asynchronous UI, we can create the scaffolding of a full chat interface in a few lines of Python. In the simplest of examples, after every user submitted input, we will invoke and display a single function that tells the current server time.
import gradio as gr
from datetime import datetime

def get_current_time(message, history):
    """Returns the current time in a user-friendly format."""
    now = datetime.now()
    current_time = now.strftime("%I:%M:%S %p")
    return f"The current time is {current_time}."

gr.ChatInterface(fn=get_current_time, title="Time Bot").launch()
Deploying an ADK + Gradio Chatbot to GCP Cloud Run
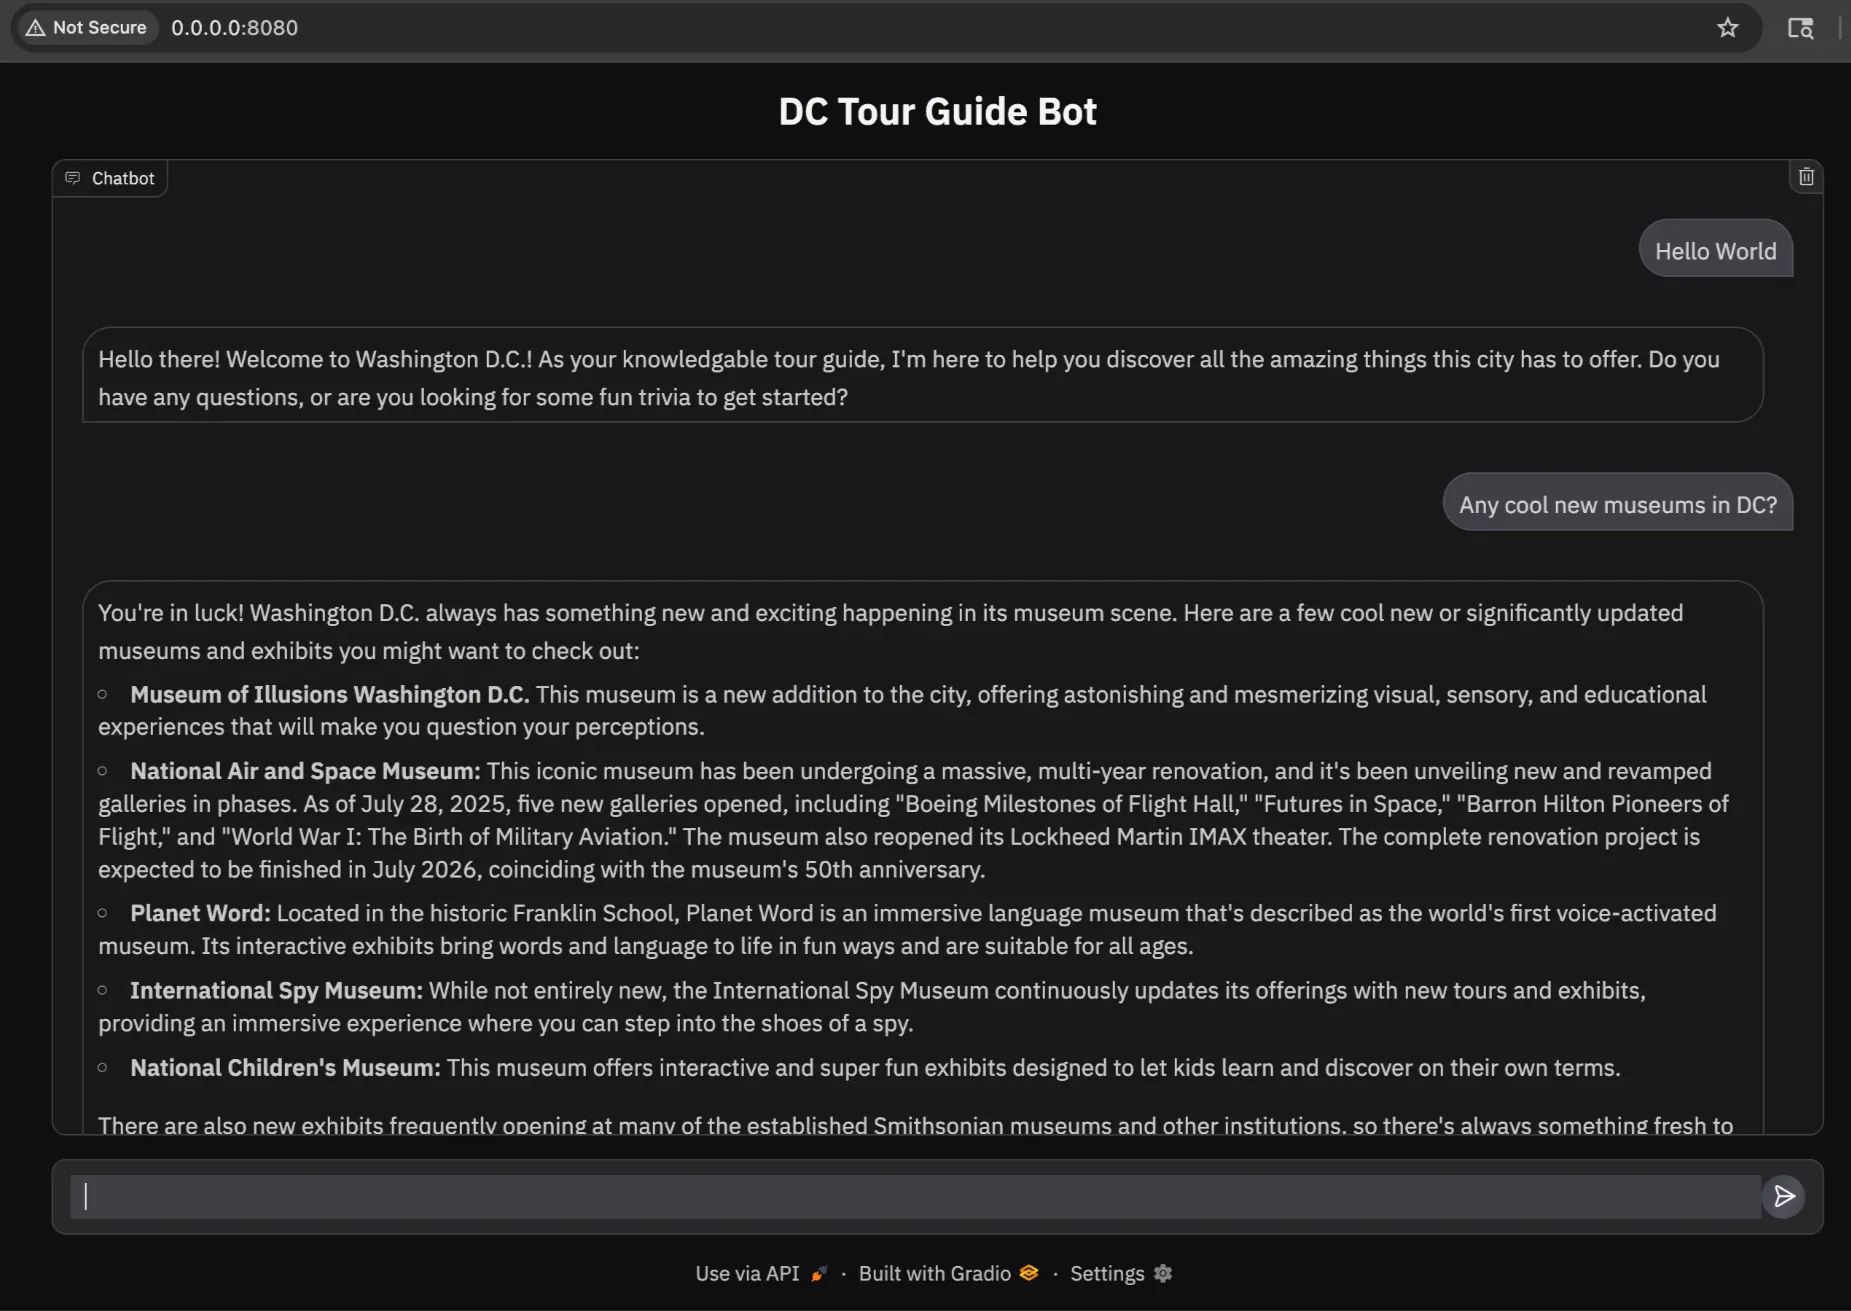
Let’s take that previous chatbot example, and imagine if we configured the function to invoke a deployed ADK agent. Let’s use Google’s Vertex AI Agent Engine to host our own simple ADK agent.
If you have already have a deployed Agent Engine in Vertex AI, you can find its Agent Engine ID and skip a few steps below.
Prerequisites
We’re going to use a sample ADK agent generated using the Agent Starter Pack. This allows us to create a fully-deployable repo with only a few CLI prompts. The dc-adk-app is nearly identical to the adk_base template, except for a minor prompt change, instructing the agent to act as a knowledgable tour guide of Washington DC.
import datetime
import os
from zoneinfo import ZoneInfo

import google.auth
from google.adk.agents import Agent
from google.adk.tools.google_search_tool import google_search

_, project_id = google.auth.default()
os.environ.setdefault("GOOGLE_CLOUD_PROJECT", project_id)
os.environ.setdefault("GOOGLE_CLOUD_LOCATION", "global")
os.environ.setdefault("GOOGLE_GENAI_USE_VERTEXAI", "True")

root_agent = Agent(
    name="root_agent",
    model="gemini-2.5-flash",
    instruction="You are a helpful AI assistant that acts as a knowledgable Washington DC tour guide. Provide fun trivia and answer any questions about the city.",
    tools=[google_search],
)
Clone the szns-gradio repo and cd into the dc-adk-app. Authenticate with gcloud and then run the make backend command to kick off a deployment.
# Create repo, cd into directory, and authenticate
git clone https://github.com/SZNS/szns-gradio.git
cd szns-gradio/dc-adk-app
gcloud auth application-default login

# Execute deployment script
make backend
After a few minutes, your Agent Engine instance should be fully deployed, and your terminal output should have a line that looks like this:
projects/[PROJECT_ID]/locations/[GCP_REGION]/reasoningEngines/[ENGINE_ID]
Copy that full resource name. We are going to need it in the file app.py in the directory szns-gradio/gradio-examples/
For local development, you can set that resource name as an environment variable in your terminal like:
export AGENT_ENGINE_ID=<your_resource_name>
The full app.py takes our original example and adds a utility method to call the ADK and passes a session management dictionary to track conversation through the page visit.
Let’s install the necessary requirements (if you haven’t already done so during the Hello World section) and run the application.
# 1. Navigate to the /gradio-examples directory
cd gradio-examples

# 2. Create a virtual environment in the current folder
uv venv

# 3. Activate the virtual environment to isolate dependencies
source .venv/bin/activate

# 4. Install all required packages from the requirements file
uv pip install -r requirements.txt

# 5. Run the application
python app.py
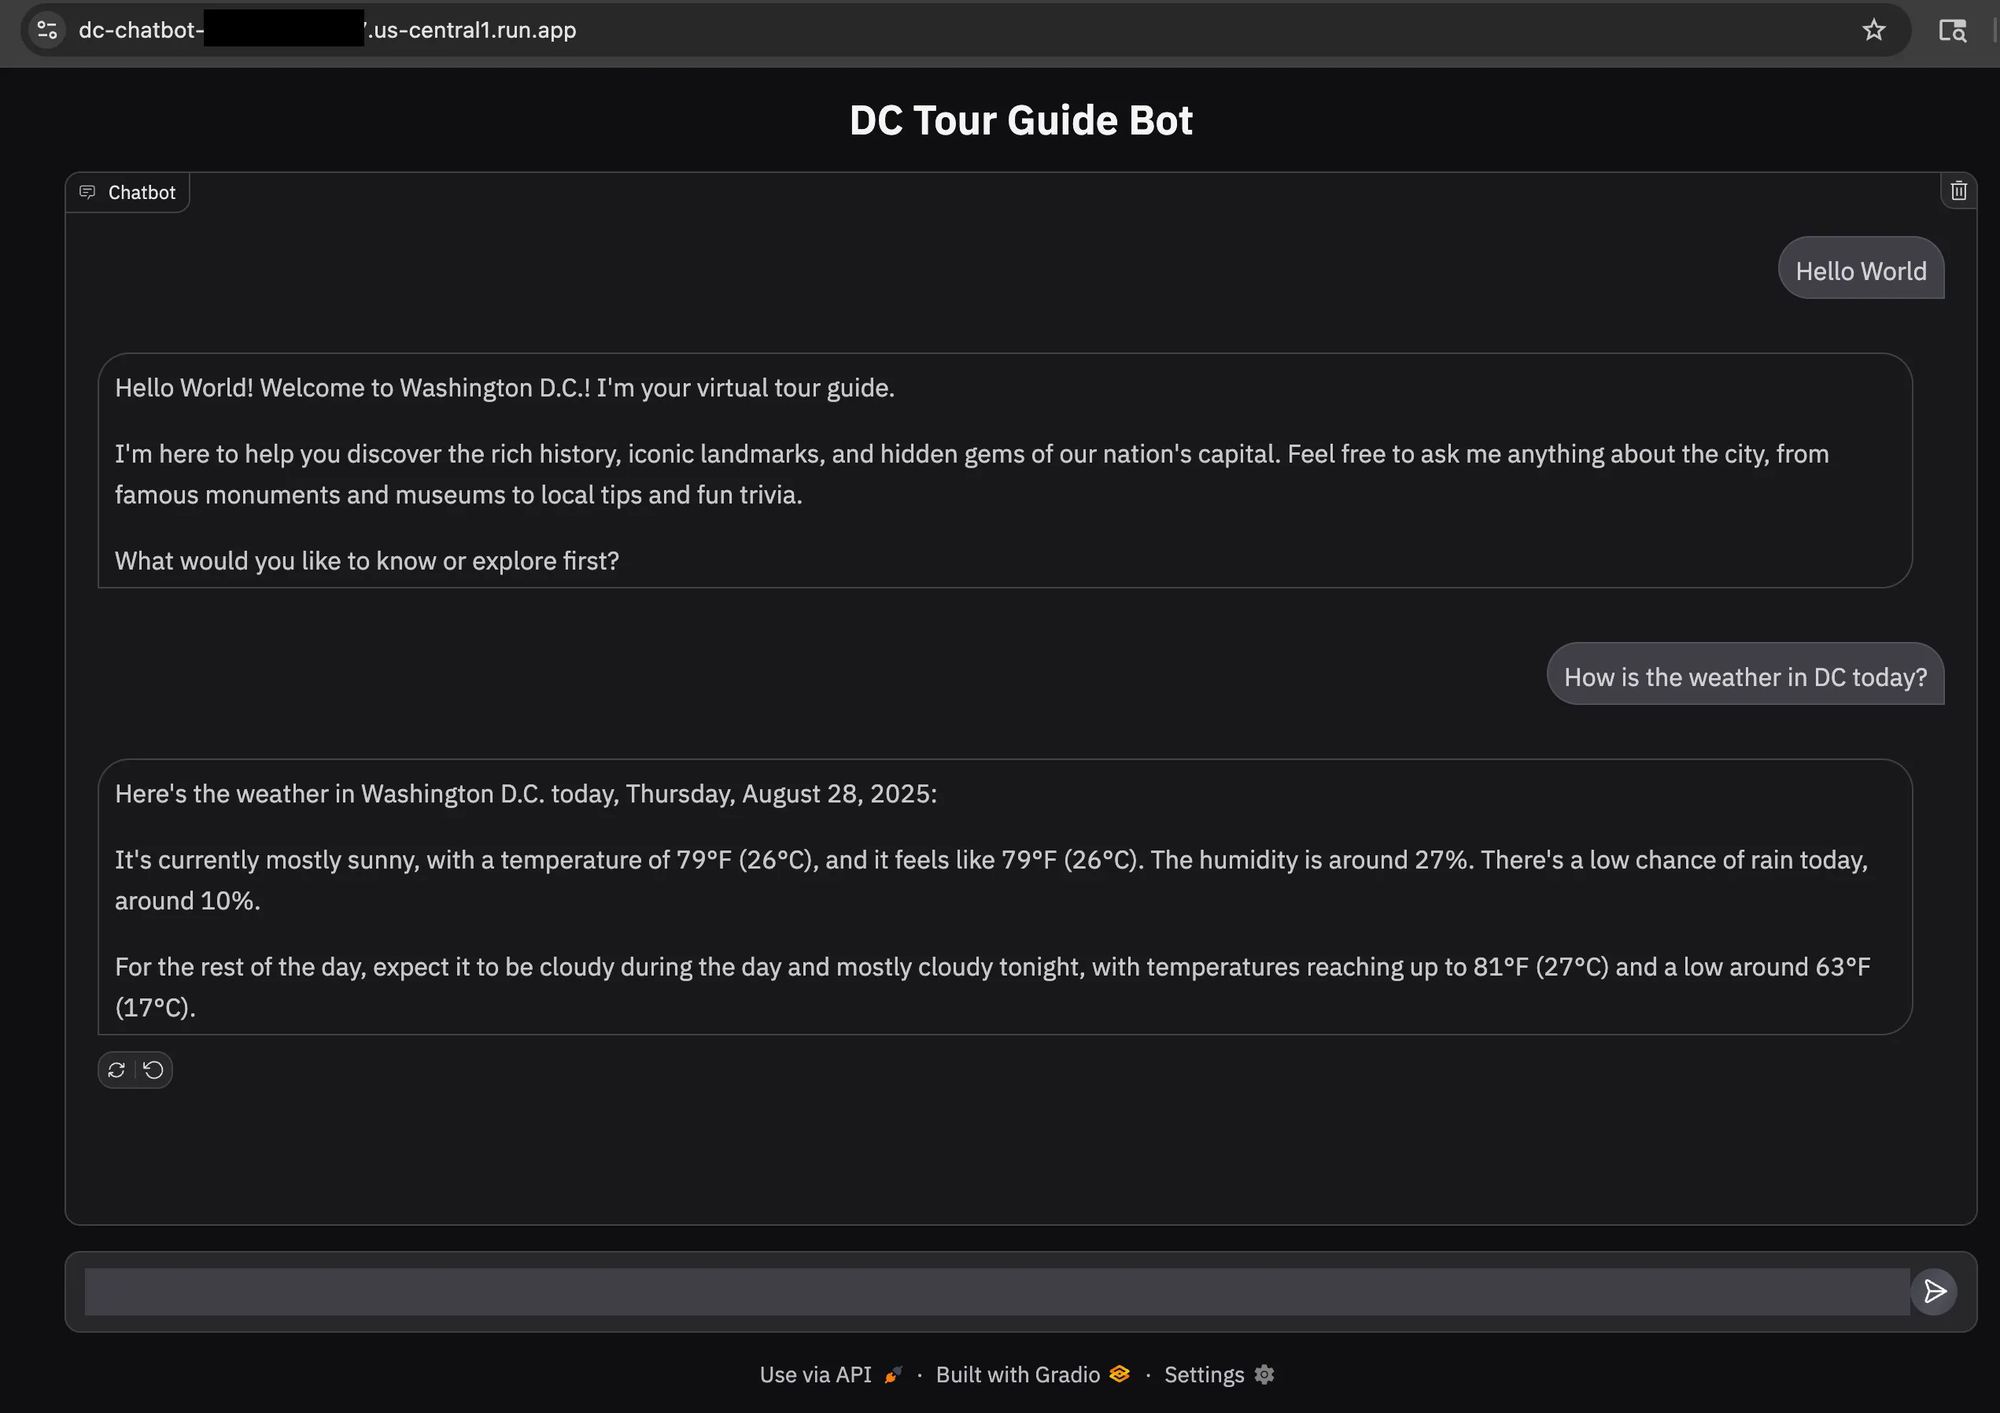
Now you can test your deployed Agent Engine Instance and view the URL in your browser.
Now that we have our deployed Agent Engine and our Gradio code, we’re ready to deploy to Cloud Run for the world to see.
# Navigate to the /gradio-examples directory
cd gradio-examples

# Insert your Agent Engine ID from a few steps ago and run this command to deploy to Cloud Run
gcloud run deploy dc-chatbot \
    --source . \
    --port 8080 \
    --region us-central1 \
    --allow-unauthenticated \
    --set-env-vars AGENT_ENGINE_ID="<your_engine_resource_id>"
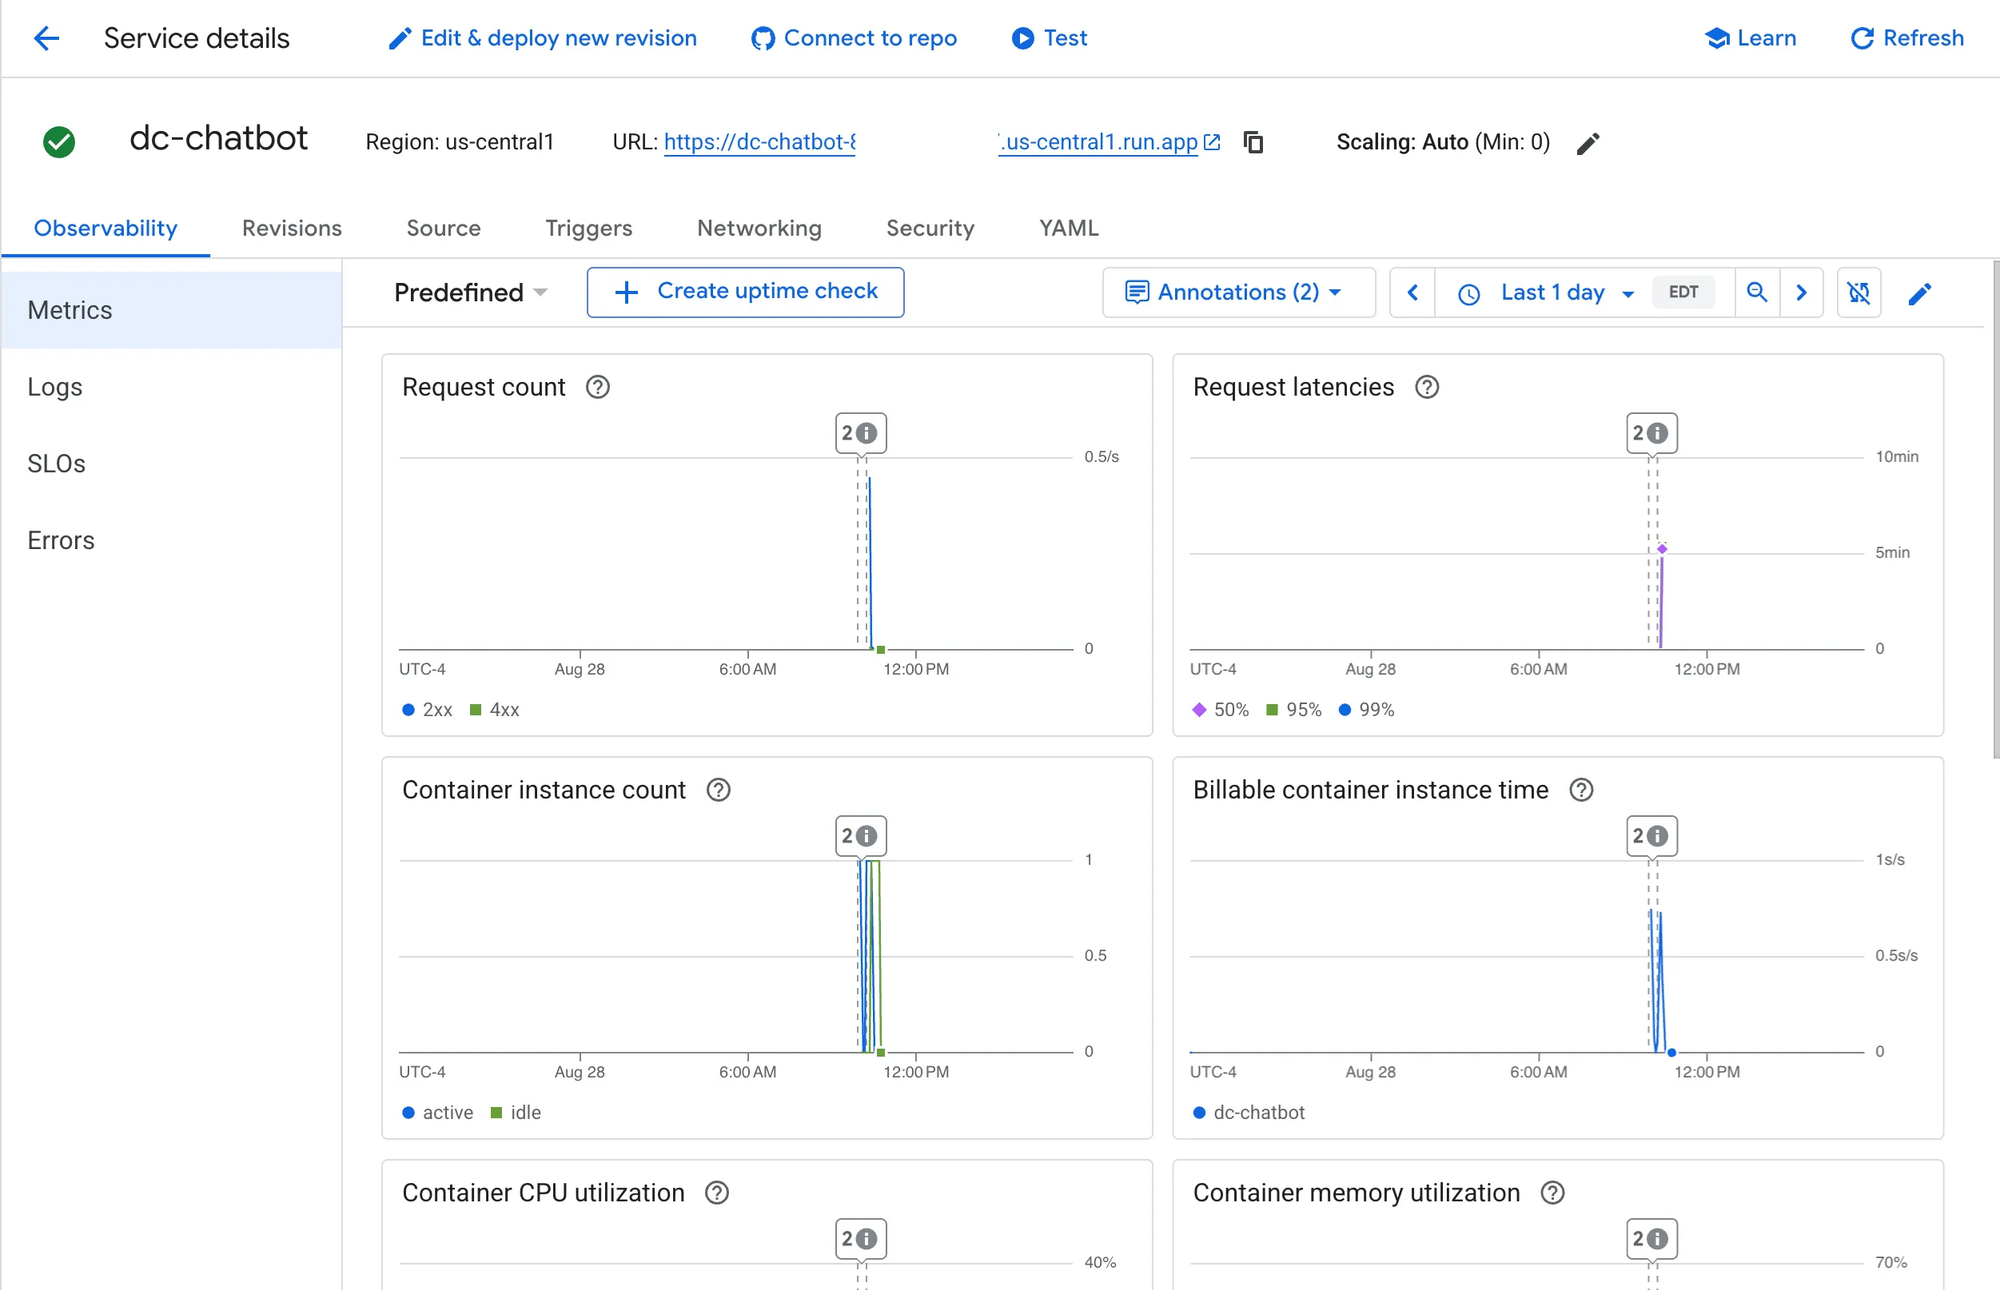
After a few minutes, you should have your full-stack AI app written entirely in Python hosted on Cloud Run and ready for users.
Theming
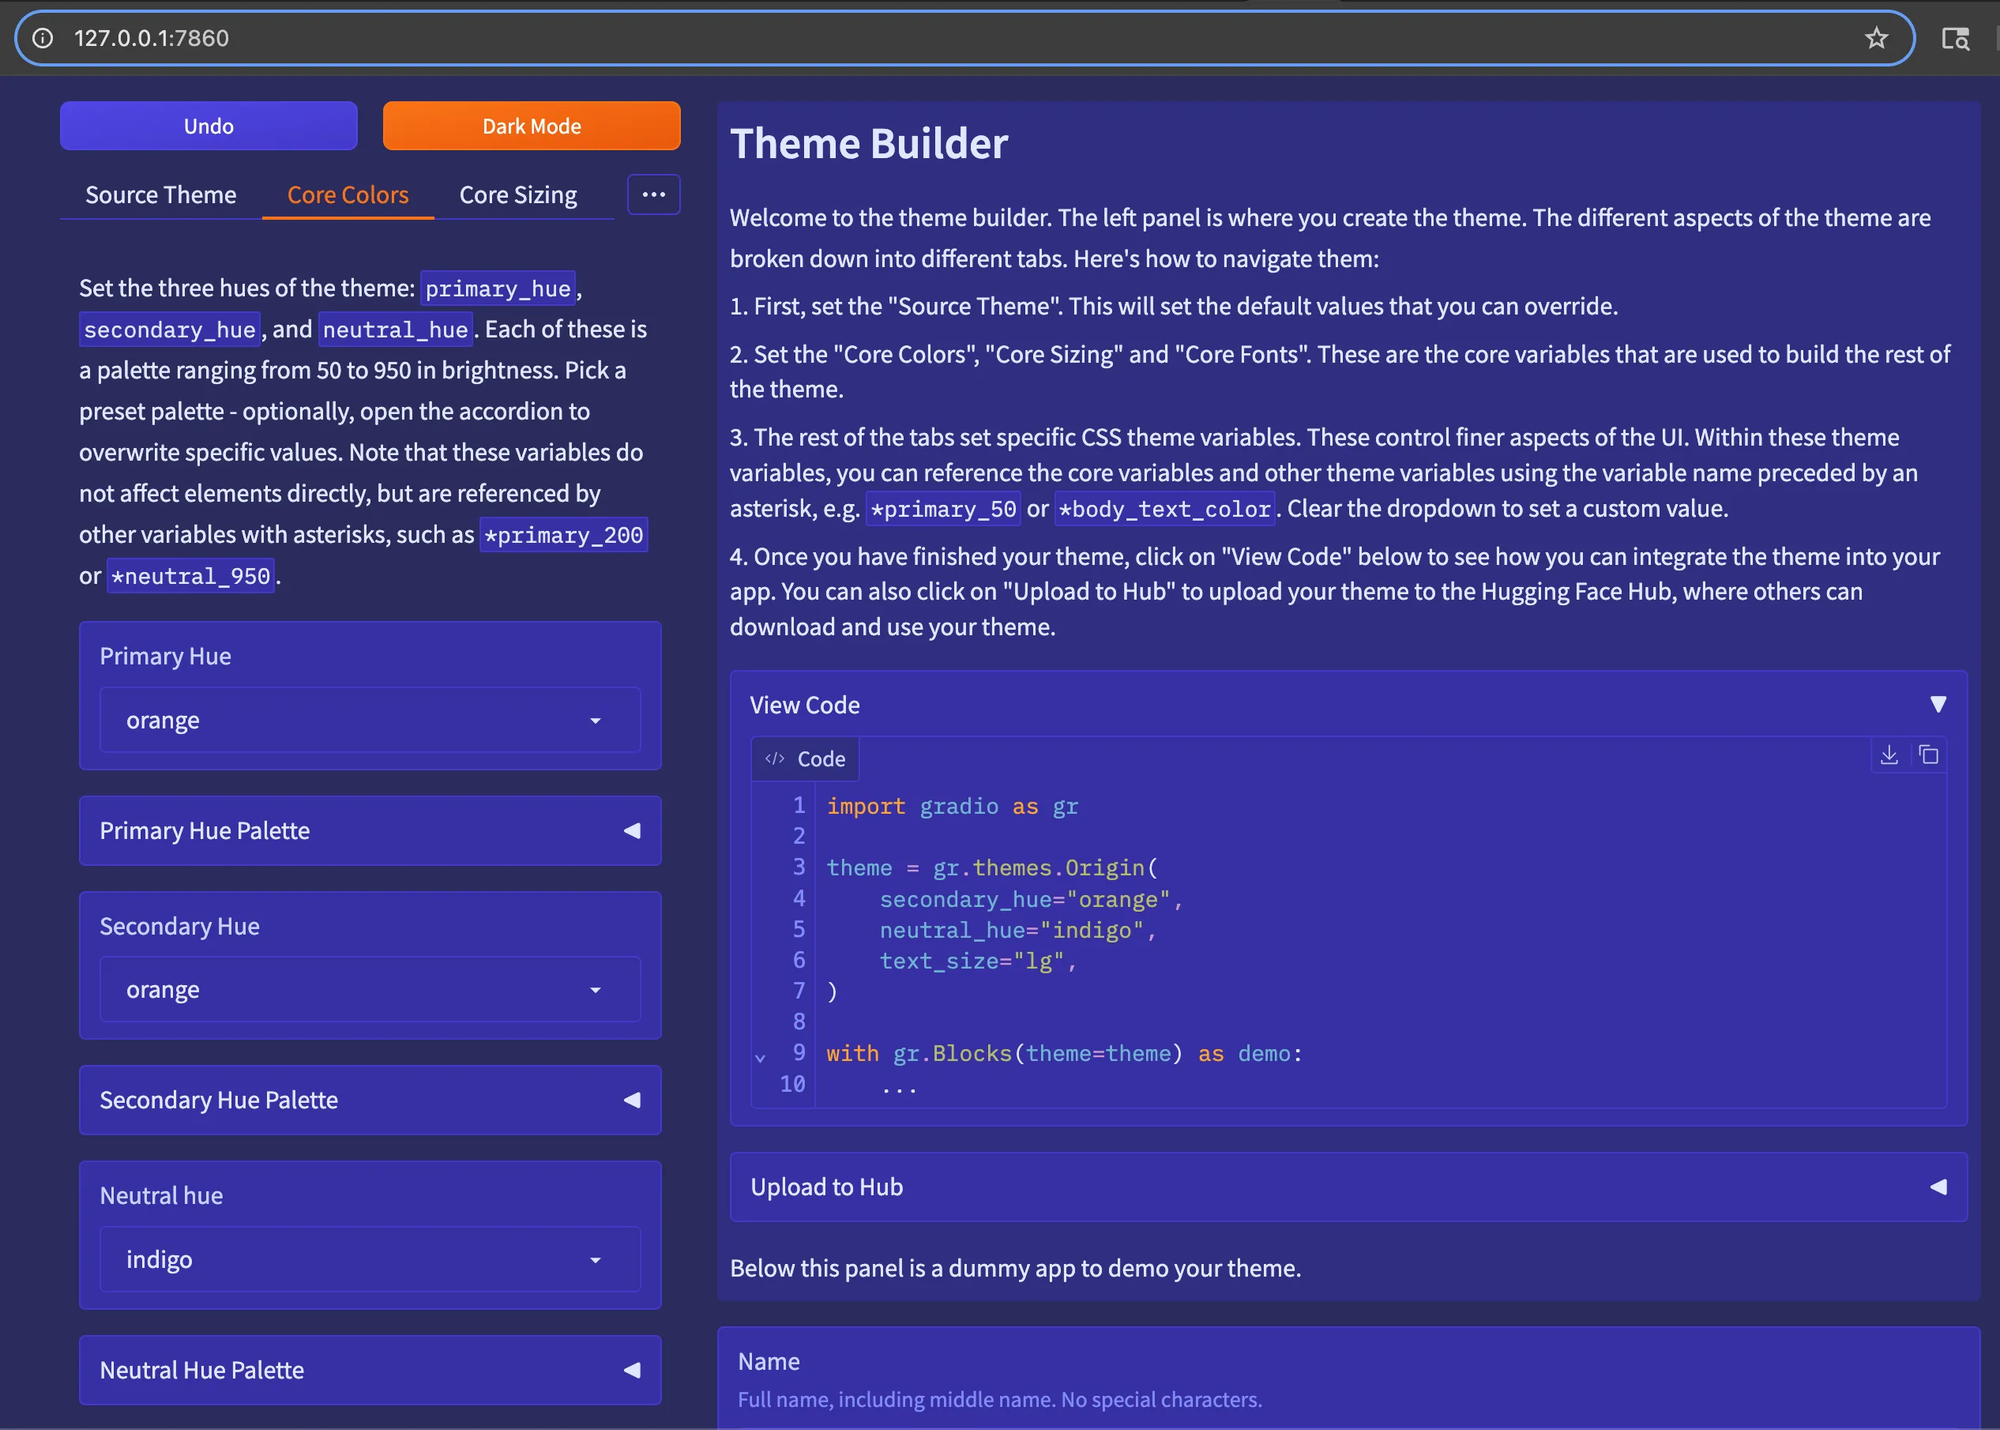
Gradio offers a feature called Theming that lets you configure the colors and styling of your components through Python code and an interactive UI.
cd gradio-examples
python theme_builder.py
You can select and configure multiple aspects of your theme and/or work off of existing templates.
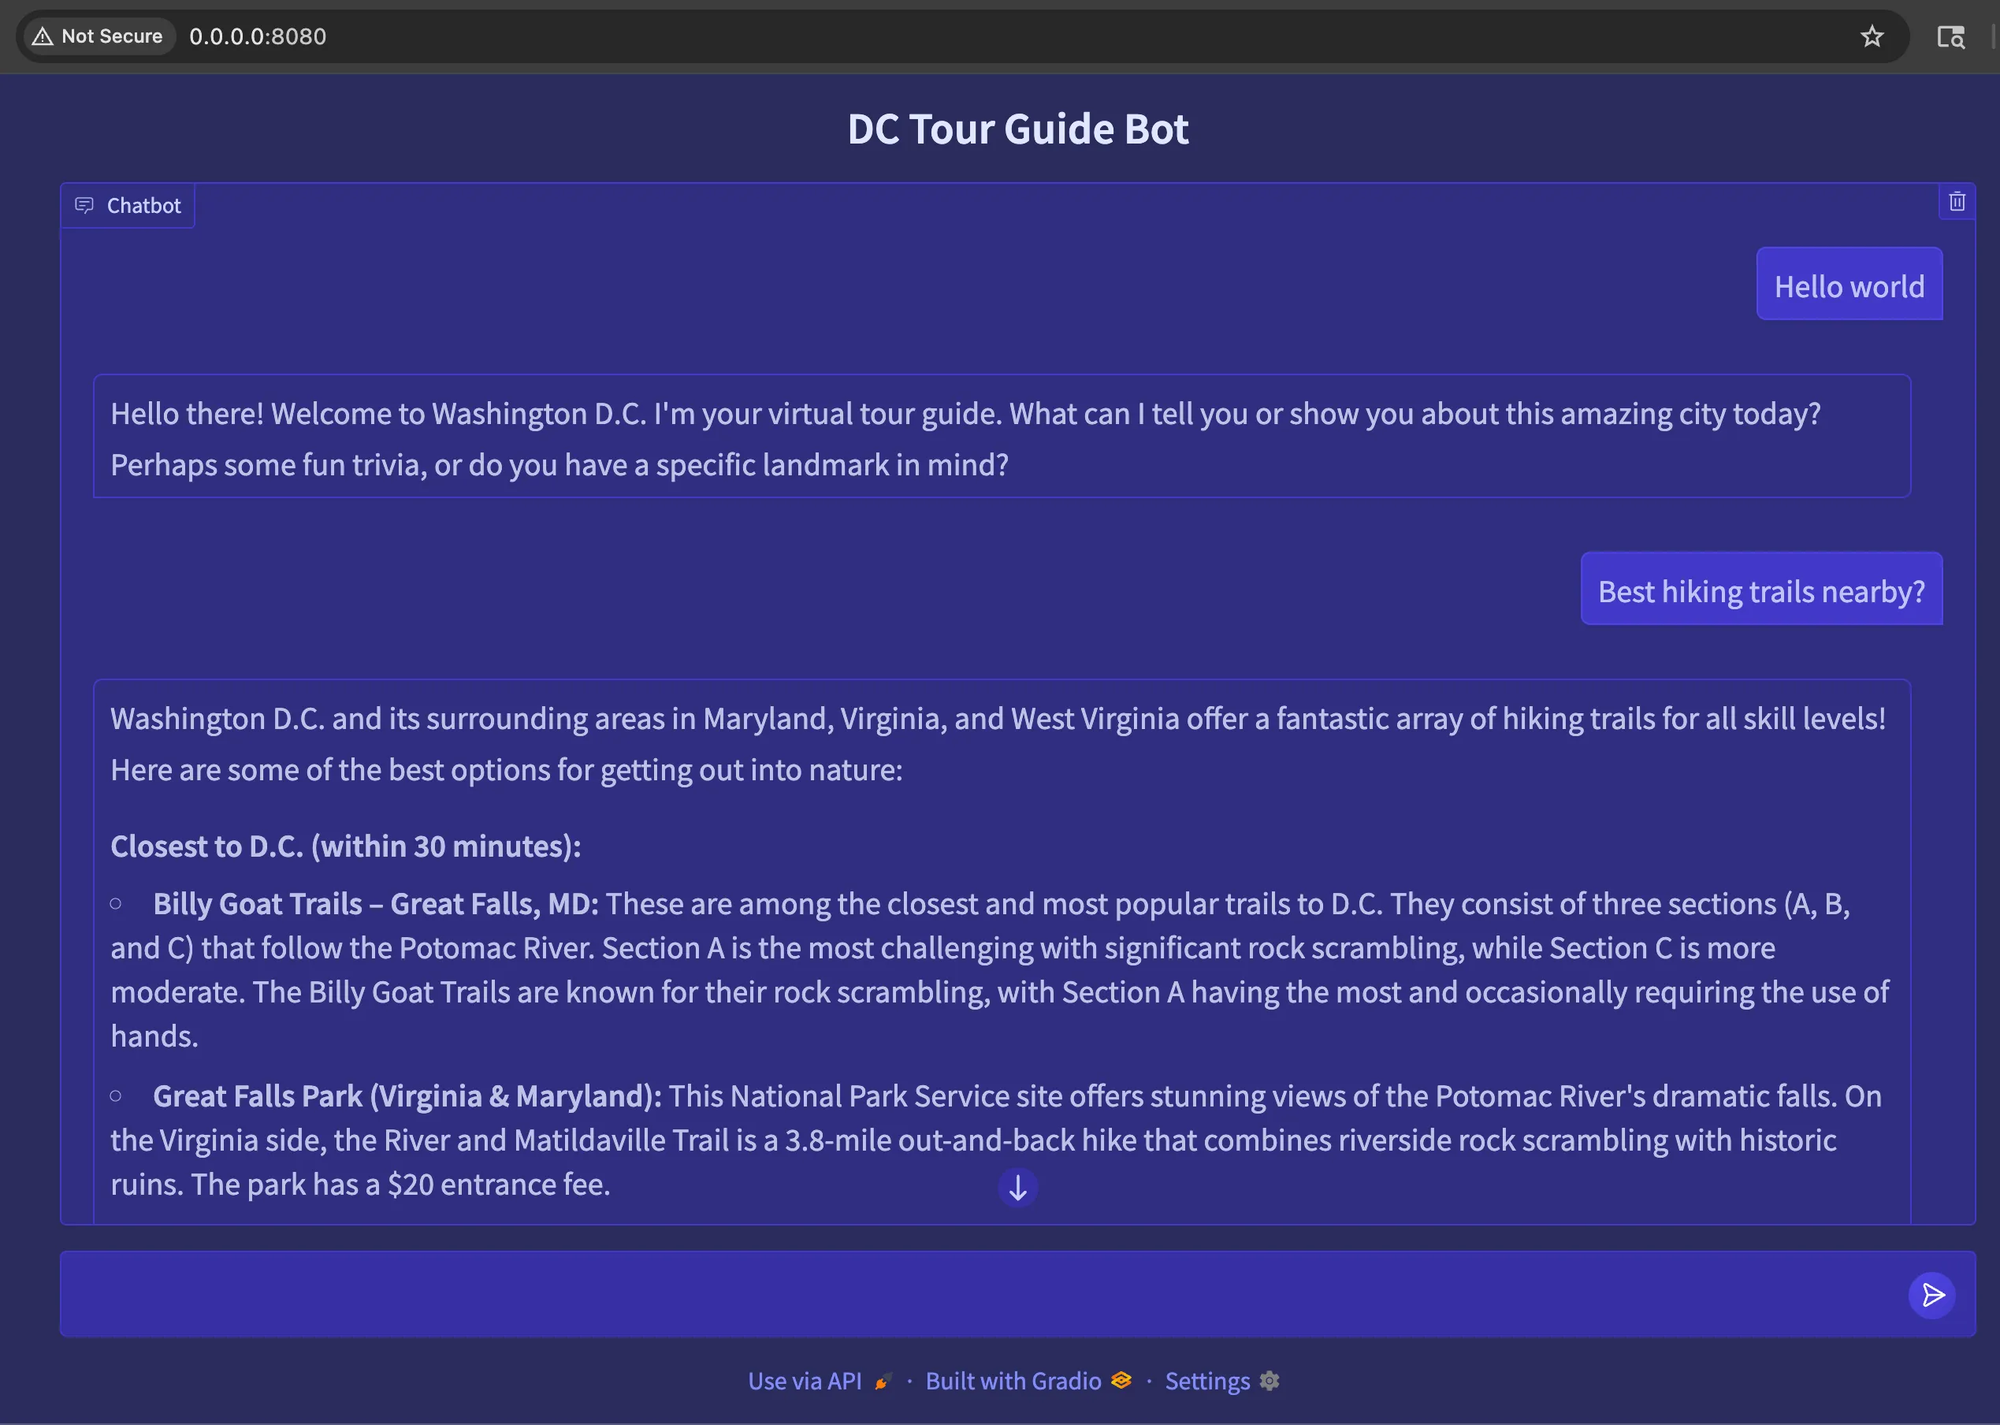
And now adding that code snippet to our app.py.
Conclusion
The AI ecosystem is moving fast, and becoming more accessible by the day. Spend more time building solutions that matter to you, and use tools like Google’s ADK and Gradio to streamline “the last mile” of getting an app or proof-of-concept out the door.
Here at SZNS Solutions, Gradio helps us accelerate our development cycles by letting us focus on what we do best: building data pipelines, creating AI applications using Document AI and RAG on GCP, and developing blockchain ETL systems.
For more information on how SZNS Solutions can help you and your business, reach out to us here: https://szns.solutions/contact